
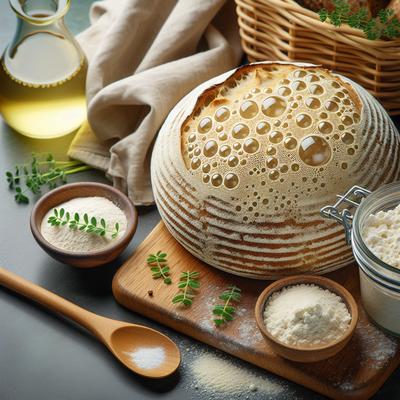
Sourdough Starter for Classic Sourdough Bread
Unlock the timeless art of sourdough bread-making with this easy and rewarding guide to creating your own sourdough starter. Using just two simple ingredients—unbleached all-purpose flour and filtered or spring water—you’ll cultivate a living, tangy ferment bursting with beneficial wild yeast and bacteria. This step-by-step process spans about 5–7 days and walks you through daily feedings that transform your starter into a bubbly, tangy powerhouse, perfect for baking classic sourdough bread. The tutorial includes pro tips like the “float test” to ensure your starter is ready to leaven your bread, as well as guidance on long-term storage and maintenance. Whether you’re a sourdough novice or an enthusiast, this recipe sets the foundation for endless artisanal baking adventures.
Try SnapCalorie's FREE AI assisted nutrition tracking free in the App store or on Android.

Scan with your phone to download!
Ingredients
- 120 grams Unbleached all-purpose flour
- 120 grams Filtered or spring water
Directions
Step 1
Day 1: In a medium glass, ceramic, or food-safe plastic container, combine 120 grams of unbleached all-purpose flour and 120 grams of filtered or spring water. Stir thoroughly to form a thick, pancake-batter-like consistency. Cover loosely with a clean kitchen towel or plastic wrap. Allow the mixture to sit at room temperature (21-25°C or 70-77°F) for 24 hours.
Step 2
Day 2: Check the mixture for any signs of bubbles or activity. If there are none, don’t worry; this is normal. Discard half of the starter (about 120 grams), leaving approximately 120 grams behind. Add another 120 grams of flour and 120 grams of water, and stir thoroughly. Cover and let sit at room temperature for another 24 hours.
Step 3
Day 3: By now, you should begin to see some small bubbles and detect a slightly tangy smell. Discard half of the starter again, leaving about 120 grams in the container. Feed it with 120 grams of flour and 120 grams of water, stirring well. Cover and allow it to rest for another 24 hours at room temperature.
Step 4
Day 4: The starter should now have more bubbles and a stronger tangy aroma. Repeat the process of discarding half the starter and feeding it with 120 grams of flour and 120 grams of water. Cover and leave it at room temperature for 24 hours.
Step 5
Day 5: Your starter should now be very active, with lots of bubbles and a noticeably tangy, fermented smell. Repeat the same discard and feeding process. If your kitchen is cool and your starter is slow to develop, you may need to continue for a few more days to reach peak activity.
Step 6
Day 6: Test the starter’s readiness by performing the 'float test.' Drop a spoonful of starter into a glass of water. If it floats, your starter is ready for baking! If it sinks, continue with twice-daily feedings until the desired activity level is achieved.
Step 7
Day 7 and Beyond: Once your starter is active and bubbly, you can store it in the refrigerator if you do not plan to bake every day. Feed it once a week to maintain its strength. When ready to bake, bring it to room temperature and feed it 6-8 hours before use.
Nutrition Facts
| Serving size | (240g) |
|---|
| Amount per serving | % Daily Value* |
|---|---|
| Calories | 436.8 |
| Total Fat 1.2g | 0% |
| Saturated Fat 0.2g | 0% |
| Cholesterol 0mg | 0% |
| Sodium 2.4mg | 0% |
| Total Carbohydrate 91.6g | 0% |
| Dietary Fiber 3.2g | 0% |
| Total Sugars 0.3g | |
| Protein 12.4g | 0% |
| Vitamin D 0IU | 0% |
| Calcium 18mg | 0% |
| Iron 1.4mg | 0% |
| Potassium 128.4mg | 0% |
Source of Calories