
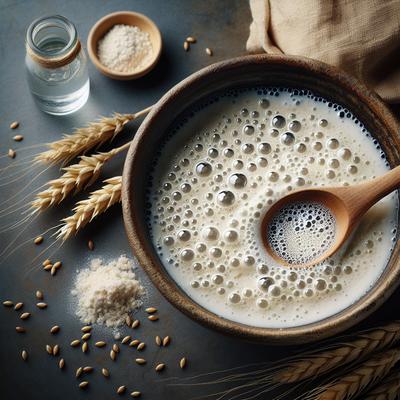
Sourdough Starter 2
Unlock the magic of homemade sourdough with our "Sourdough Starter 2" recipe—a simple, five-ingredient method to cultivate a vibrant, active starter from scratch. Using just unbleached all-purpose flour and filtered water, this step-by-step guide walks you through nurturing wild yeast and bacteria over the course of 5 to 7 days, resulting in a tangy, bubbly base perfect for artisanal breads, pancakes, and more. Designed for beginner and seasoned bakers, this starter requires minimal ingredients and a modest 15 minutes of daily care, making it an approachable way to elevate your baking game. Plus, it’s easy to maintain with simple weekly feedings—ideal for those who love to keep their sourdough dreams alive. Let your kitchen become a laboratory of fermentation and flavor with this foolproof recipe!
Try SnapCalorie's FREE AI assisted nutrition tracking free in the App store or on Android.

Scan with your phone to download!
Ingredients
- 120 grams Unbleached all-purpose flour
- 120 grams Filtered or distilled water
Directions
Step 1
Day 1: In a clean glass or plastic container, combine 120 grams of unbleached all-purpose flour and 120 grams of filtered or distilled water. Stir with a spoon or spatula until fully combined into a thick, pancake-like consistency. Cover loosely with a breathable fabric (e.g., cheesecloth or a clean towel) to allow airflow while preventing debris from entering. Let it sit at room temperature (68-75°F) for 24 hours.
Step 2
Day 2: Discard half of the starter from Day 1. Add 120 grams of fresh unbleached all-purpose flour and 120 grams of filtered or distilled water to the remaining starter. Stir thoroughly, cover loosely, and let sit for another 24 hours at room temperature.
Step 3
Day 3: Repeat the process from Day 2—discard half of the starter, then feed with 120 grams of flour and 120 grams of water. By now, you may start to see bubbles, which indicate fermentation.
Step 4
Day 4: As fermentation becomes more active, the starter will rise and fall more predictably. Continue discarding half and feeding with 120 grams each of flour and water every 24 hours.
Step 5
Day 5 to 7: By the fifth day, your starter should display consistent bubbling, a tangy aroma, and doubling in size several hours after each feeding. Continue the feeding routine until the starter is vigorously active and ready for bread-making.
Step 6
Storage: Once the starter is active, you can place it in the refrigerator and feed it weekly if not in regular use. To bake with it, bring it to room temperature and feed 1-2 times before using.
Nutrition Facts
| Serving size | (240g) |
|---|
| Amount per serving | % Daily Value* |
|---|---|
| Calories | 436.8 |
| Total Fat 1.2g | 0% |
| Saturated Fat 0.2g | 0% |
| Cholesterol 0mg | 0% |
| Sodium 2.4mg | 0% |
| Total Carbohydrate 91.6g | 0% |
| Dietary Fiber 3.2g | 0% |
| Total Sugars 0.3g | |
| Protein 12.4g | 0% |
| Vitamin D 0IU | 0% |
| Calcium 18mg | 0% |
| Iron 1.4mg | 0% |
| Potassium 128.4mg | 0% |
Source of Calories