Gluten Free Brown Rice Sourdough Starter
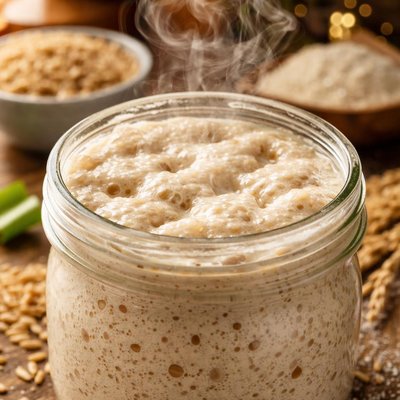
Transform your baking with this Gluten-Free Brown Rice Sourdough Starter, the ultimate foundation for creating delicious, naturally leavened gluten-free breads! Crafted with simple pantry staples like brown rice flour and filtered water, this recipe guides you through an easy step-by-step fermentation process over six days. You'll develop a bubbly and tangy starter that’s not only gluten-free but also packed with the rich, earthy flavors of brown rice. Perfect for those with dietary restrictions, this starter is a must-have for gluten-free baking enthusiasts looking to incorporate artisanal sourdough into their kitchen. Follow the detailed instructions to achieve a robust, active starter that can be maintained and used for endless sourdough creations!
Smart Nutrition Tracking with SnapCalorie
Explore More
Recipe Information
Ingredients
- 1 cup Brown rice flour
- 1 cup Filtered water
- 4 cups Additional brown rice flour
- 4 cups Additional filtered water
Instructions
Day 1: In a clean glass or ceramic jar, combine 1 cup of brown rice flour and 1 cup of filtered water. Stir well to form a smooth paste. Cover the jar loosely with a breathable cloth or paper towel secured with a rubber band. Place the jar in a warm spot (around 70°F–75°F) away from direct sunlight. Let it sit for 24 hours.
Day 2: Check your starter for any bubbles or activity; it’s okay if you don’t see much yet. Discard half of the mixture (about 1/2 cup). Add 1/2 cup of brown rice flour and 1/2 cup of filtered water. Stir well, cover, and return the jar to its warm spot for another 24 hours.
Day 3: Repeat the feeding process. Discard half of the starter, then add 1/2 cup of brown rice flour and 1/2 cup of filtered water. Stir thoroughly, ensuring there are no clumps, and cover again.
Day 4: By now, you should start noticing bubbles and a slightly tangy aroma, indicating fermentation. Discard half of the starter and feed it again with 1/2 cup of brown rice flour and 1/2 cup of water. Stir well and cover. Return it to the warm spot.
Day 5: Repeat the feeding process as before (discard half, then add 1/2 cup of brown rice flour and 1/2 cup of filtered water). At this stage, the starter should have a consistent bubbly texture and a stronger sour smell. This indicates that it is nearly ready.
Day 6: Continue with the same process—discarding and feeding. The starter should now double in size within 4–6 hours after feeding, signaling that it is active and ready to use for baking. If not, continue the feeding process for another 1–2 days until it becomes bubbly and active.
Storage: Once the starter is fully active, you can store it in the refrigerator. Feed it weekly (or the night before baking) by discarding half, then replenishing with 1/2 cup of brown rice flour and 1/2 cup of filtered water.
Nutrition Facts
Calories |
2332 | ||
|---|---|---|---|
% Daily Value* |
|||
| Total Fat | 18.4 g | 24% | |
| Saturated Fat | 3.7 g | 18% | |
| Polyunsaturated Fat | 0.0 g | ||
| Cholesterol | 0 mg | 0% | |
| Sodium | 31 mg | 1% | |
| Total Carbohydrate | 487.8 g | 177% | |
| Dietary Fiber | 29.5 g | 105% | |
| Total Sugars | 3.7 g | ||
| Protein | 46.0 g | 92% | |
| Vitamin D | 0.0 mcg | 0% | |
| Calcium | 70 mg | 5% | |
| Iron | 7.4 mg | 41% | |
| Potassium | 1673 mg | 36% | |
*The % Daily Value tells you how much a nutrient in a serving of food contributes to a daily diet. 2,000 calories a day is used for general nutrition advice.
