
Classic San Francisco Sourdough Bread
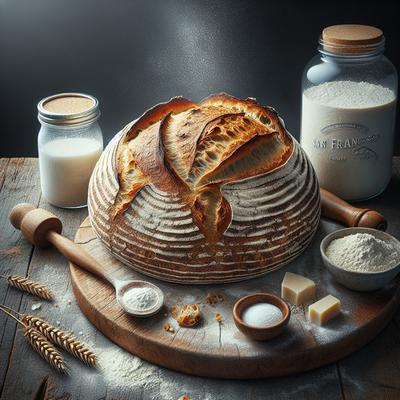
Transport your taste buds to the heart of the Bay Area with this Classic San Francisco Sourdough Bread recipe, a timeless ode to the city’s iconic tangy, chewy loaves. Made with just four simple ingredients—active sourdough starter, all-purpose flour, water, and salt—this recipe relies on traditional techniques like the autolyse stage, stretch-and-folds, and a long fermentation process to develop a beautifully complex flavor and airy crumb. Baked to perfection in a Dutch oven for that signature crackling crust, this bread boasts the ideal balance of a crisp exterior and a soft, tender interior. Perfect for artisan bread enthusiasts, this recipe delivers a homemade sourdough loaf brimming with character, ideal for hearty sandwiches, morning toast, or as the centerpiece of your next dinner table. Whether you’re new to sourdough or a seasoned baker, this step-by-step guide will help you master the art of crafting bakery-quality bread right in your own kitchen.
Log this recipe in SnapCalorie

Recipe Information
Ingredients
- 150 grams Active sourdough starter
- 500 grams All-purpose flour
- 350 grams Water
- 10 grams Salt
Instructions
1. Feed your sourdough starter the night before making your dough to ensure it is active and bubbly.
2. In a large mixing bowl, combine the sourdough starter and water. Stir to dissolve the starter into the water.
3. Add the flour to the bowl and mix thoroughly until no dry spots remain. Cover the bowl with a damp towel and let it rest for 30 minutes to allow the flour to hydrate (autolyse stage).
4. After the rest period, add the salt to the dough. Use your hands to gently incorporate the salt, folding and pinching the dough to distribute it evenly.
5. Begin a series of stretch-and-folds by pulling one side of the dough, stretching it upwards, and folding it over the rest of the dough. Rotate the bowl a quarter turn and repeat this process 4-6 times in total. Cover the bowl again and rest the dough for 30 minutes.
6. Repeat the stretch-and-fold process approximately 4 times over the next 2 hours, resting the dough for 30 minutes between each session. This process strengthens the gluten structure and builds elasticity.
7. After the final stretch-and-fold, cover the dough and let it bulk ferment at room temperature for 4-6 hours, or until it has doubled in size and is light and airy.
8. Turn the dough out onto a lightly floured surface and shape it into a round or oval loaf. Place the shaped loaf into a floured banneton or a bowl lined with a floured kitchen cloth, seam side up. Cover and let it proof at room temperature for 60-90 minutes, or until it passes the poke test (a gentle poke leaves a slight indentation).
9. Preheat your oven to 475°F (245°C) with a Dutch oven or baking stone inside. Allow the oven and the Dutch oven to heat for at least 30 minutes.
10. Once the dough is ready, carefully transfer it onto parchment paper for easy handling. Score the top of the loaf with a sharp razor or bread lame to allow it to expand in the oven.
11. Remove the preheated Dutch oven from the oven and carefully place the dough inside using the parchment paper as a sling. Cover the Dutch oven with its lid and return it to the oven.
12. Bake the bread for 20 minutes with the lid on, then remove the lid and continue baking for another 20 minutes, or until the crust is deep golden brown and the loaf sounds hollow when tapped on the bottom.
13. Let the bread cool completely on a wire rack before slicing. Cooling allows the crumb to set and enhances the flavor.
Nutrition Facts
Calories |
1895 | ||
|---|---|---|---|
% Daily Value* |
|||
| Total Fat | 5.6 g | 7% | |
| Saturated Fat | 0.9 g | 4% | |
| Polyunsaturated Fat | 0.0 g | ||
| Cholesterol | 0 mg | 0% | |
| Sodium | 3953 mg | 172% | |
| Total Carbohydrate | 396.6 g | 144% | |
| Dietary Fiber | 15.1 g | 54% | |
| Total Sugars | 1.1 g | ||
| Protein | 53.1 g | 106% | |
| Vitamin D | 0.0 mcg | 0% | |
| Calcium | 96 mg | 7% | |
| Iron | 23.9 mg | 133% | |
| Potassium | 566 mg | 12% | |
*The % Daily Value tells you how much a nutrient in a serving of food contributes to a daily diet. 2,000 calories a day is used for general nutrition advice.
