
Chicken or Meat Broth or Stock Pressure Canned
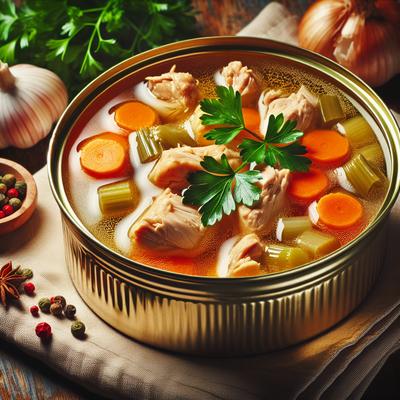
Preserve the comforting goodness of homemade broth with this detailed recipe for Chicken or Meat Broth or Stock Pressure Canned. Made from a flavorful medley of chicken or meat bones—either raw or roasted—combined with aromatic vegetables like carrots, celery, onion, and garlic, this hearty stock is simmered to perfection for hours, extracting rich nutrients and robust flavors. Infused with bay leaves, peppercorns, and an optional pinch of salt, this broth becomes a versatile kitchen staple, perfect for soups, stews, or sauces. The recipe details step-by-step instructions for pressure canning, ensuring a shelf-stable supply of your homemade broth for up to a year. Perfect for meal-preppers and home canning enthusiasts alike, this recipe delivers professional-level results with minimal effort.
Log this recipe in SnapCalorie
Recipe Information
Ingredients
- 3 pounds Chicken or meat bones (raw or roasted)
- 2 large Carrots (chopped)
- 2 large Celery stalks (chopped)
- 1 large Onion (quartered)
- 4 large Cloves of garlic (smashed)
- 2 pieces Bay leaves
- 1 teaspoon Whole peppercorns
- 1 teaspoon Salt (optional)
- 16 cups Water
Instructions
Gather your ingredients and ensure all bones and vegetables are clean and trimmed.
In a large stockpot, combine the chicken or meat bones, carrots, celery, onion, garlic, bay leaves, and peppercorns.
Pour water into the stockpot until all ingredients are fully submerged, about 16 cups or enough to mostly fill the pot.
Bring the pot to a boil over high heat, then reduce the heat to a low simmer. Skim off any foam or impurities that rise to the surface during the first 30 minutes of cooking.
Simmer uncovered for 3-4 hours, adding more water if necessary to keep ingredients submerged. For a richer broth, you can simmer up to 6 hours.
After simmering, remove the pot from heat and allow to cool slightly. Strain the broth through a fine-mesh sieve or cheesecloth into a large bowl or container, discarding the solids.
If desired, refrigerate the strained broth overnight and skim off any hardened fat from the surface before proceeding to pressure canning.
Prepare your pressure canning equipment: sterilize your jars, check that lids and seals are intact, and fill your pressure canner with water according to the manufacturer's instructions.
Reheat the broth to a rolling boil, then ladle it into hot, sterilized jars, leaving 1 inch of headspace at the top of each jar.
Wipe the rims of the jars with a clean, damp cloth, place the lids on, and screw on the bands until fingertip-tight.
Place the jars in the pressure canner, secure the lid, and bring the pressure canner up to the appropriate pressure (10 pounds for altitudes below 1,000 feet; adjust for higher altitudes). Process the jars for 20 minutes for pints and 25 minutes for quarts.
After processing, turn off the heat and allow the pressure canner to return to zero pressure naturally. Carefully remove the lid, and let the jars cool slightly in the canner for 5 minutes.
Remove the jars using a jar lifter and place them on a towel-lined surface, ensuring they are not touching. Let them cool undisturbed for 12-24 hours.
Check the seals on the jars before storing. Any unsealed jars should be refrigerated and used within a week or frozen for longer storage.
Label and date the jars before storing them in a cool, dark place. Properly canned broth can be stored for up to a year.
Nutrition Facts
Calories |
863 | ||
|---|---|---|---|
% Daily Value* |
|||
| Total Fat | 27.9 g | 36% | |
| Saturated Fat | 6.9 g | 34% | |
| Polyunsaturated Fat | 0.0 g | ||
| Cholesterol | 272 mg | 91% | |
| Sodium | 2735 mg | 119% | |
| Total Carbohydrate | 41.5 g | 15% | |
| Dietary Fiber | 8.7 g | 31% | |
| Total Sugars | 13.0 g | ||
| Protein | 101.3 g | 203% | |
| Vitamin D | 0.0 mcg | 0% | |
| Calcium | 1091 mg | 84% | |
| Iron | 8.6 mg | 48% | |
| Potassium | 1217 mg | 26% | |
*The % Daily Value tells you how much a nutrient in a serving of food contributes to a daily diet. 2,000 calories a day is used for general nutrition advice.
